
Contents
Some people settle for just having one storage drive on their computers. However, it poses a risk of losing your files when you encounter an issue requiring reset to your Windows 10 Operating System.
Having multiple partitions in a drive allows you to separate your personal files from the operating system. Thus, your data remains intact if the Operating System gets corrupted and needs to get reinstalled.
Is it possible to perform the partition without losing data? In this article, you will learn two methods to create a partition on your drive without rebooting your computer or reinstalling the operating system.
Requirements
The requirements are simple and you probably already have them. See the requirements below.
- A Windows 10 computer. Any version should work.
- You must have administrator permissions on the local computer.
- A drive with enough free space that you can extend or shrink.
Accessing Disk Management Tool
The Disk Management Tool comes with the Windows 10 Operating System. This tool allows you to manage disk drives and each associated partitions installed on your computer. Creating partitions can help you store more data without compromising the space used by your operating system.
There are different ways on how you can access the Disk Management Tool. You can choose from any of them that you see below.
Using the Start Button Context Menu
The first way to access the Disk Management Tool is from the Start button context menu. First, right-click on the Start menu on your desktop (or press Windows Key + X) and select Disk Management.
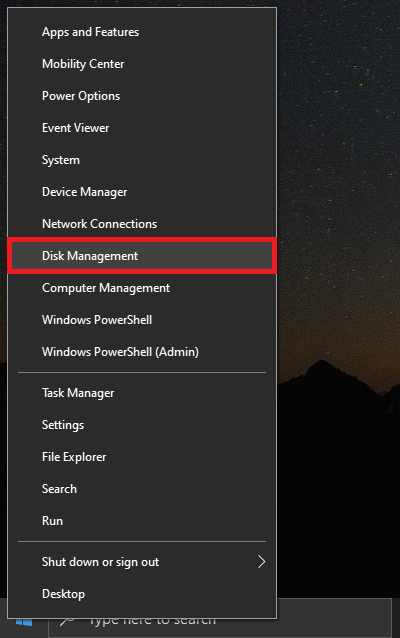
Start Button Context Menu
Using the Search Box
Another way is using the Search Box on the taskbar. To start, click on the Search and type in disk management. Choose Create and format hard disk partitions from the search result list.
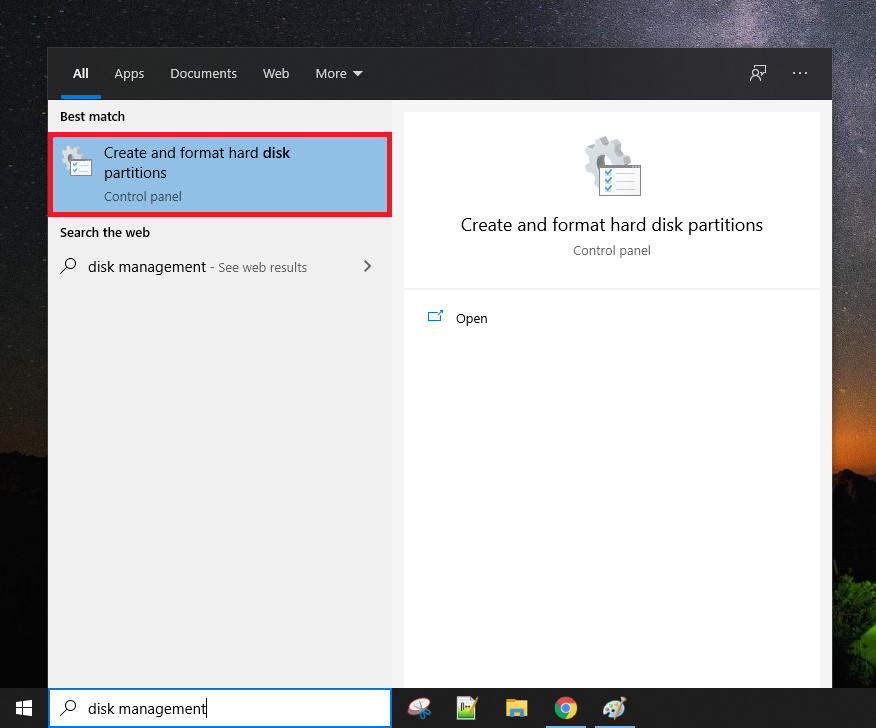
Search Box
Using the Run Command
You can also use the Run Command to access the Disk Management Tool. Press the Windows Key + R to open the Run dialog box, type in diskmgmt.msc and press Enter or click OK.
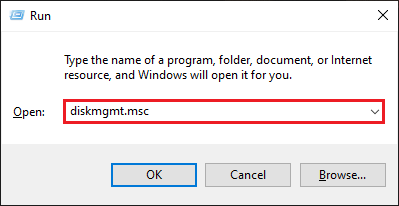
Run Command
Volume Partitioning Methods
In this section, you will learn about the two partition methods; Extend Volume and Shrink Volume. By the end of this section, you should know the difference and which method to use based on your requirements.
Extending Volumes
This method allows you to immediately extend a volume of your drive to an empty space right next to it.
On the Disk Management Tool, look for the drive that you want to extend. Right-click on the drive and select Extend Volume.
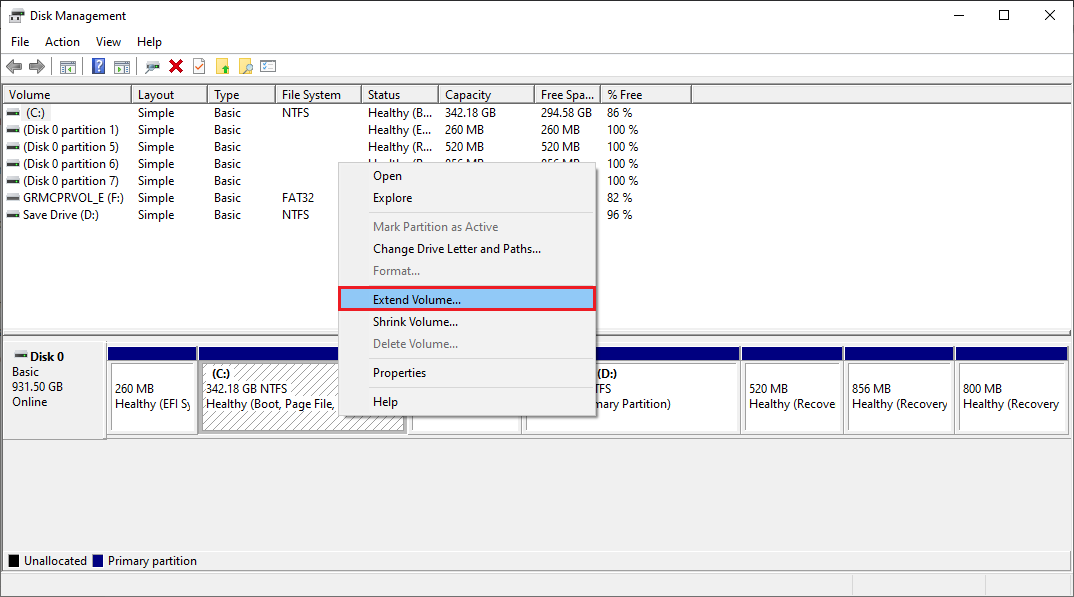
Disk Management Tool | Extending Volume
Note: If the Extend Volume option appears greyed out, proceed to the Shrink Volume method. The reason why it is greyed out is that there is no adjacent unallocated space available yet.
When you get to the Extend Volume Wizard initial page, click Next.

Extend Volume Wizard
The next step is to select the disk to partition. Type in the amount of space you want to extend, then click Next.
Note: If you want, you can add the Maximum Available Space in MB to the partition/volume.
Data Units Conversion
1024 MB = 1 GB
1024 GB = 1 TB
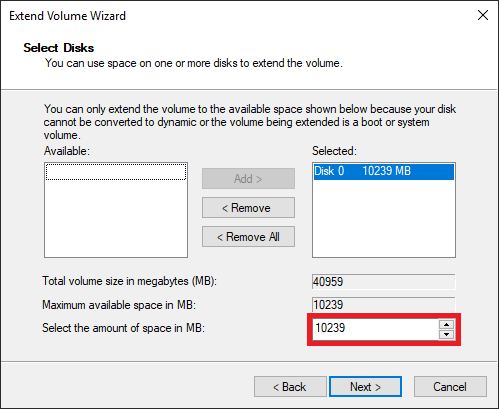
Extend Volume Wizard | Amount of space to extend
Now, click Finish to complete extending the volume.
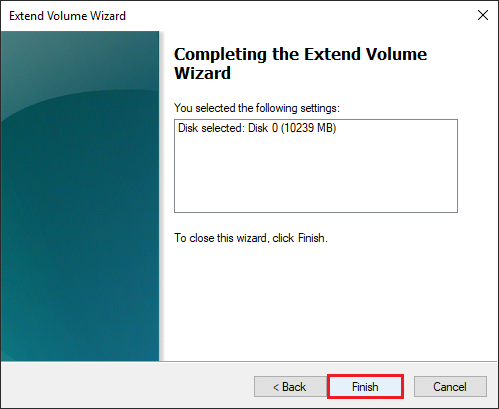
Extend Volume Wizard | Complete Extending Volume
Extending partition to a non-contiguous unallocated space will prompt you with a message asking if you want to convert the selected basic disk to a dynamic disk (see screenshot below).
Note: Converting to dynamic disk is not recommended unless it is what you intend to perform. If your Windows Operating System is on the disk that you selected for partition, then click No.
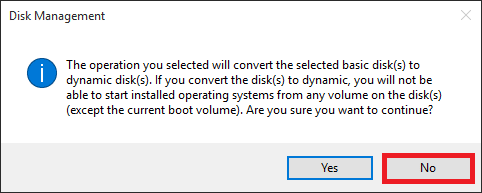
Convert basic disk to dynamic disk
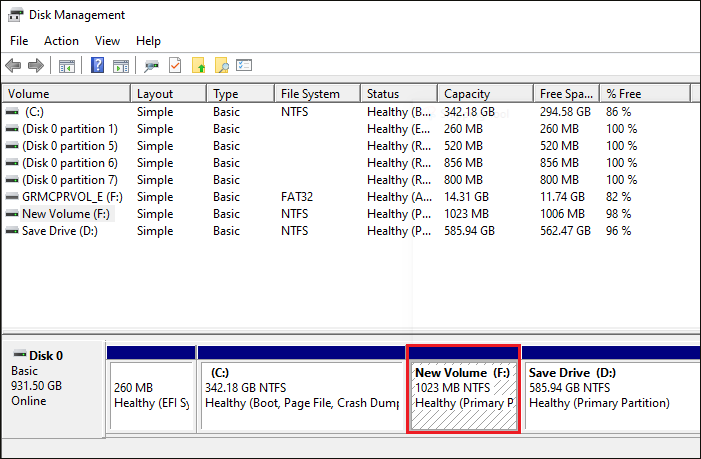
If successful, you will see the extended volume/drive (ex: “F:”) on the Disk Management Tool.

Disk Management Tool | New Volume Created
Shrinking Volumes
This method allows you to set up a new volume by decreasing the space used by your drive and creating an adjacent unallocated space. It also gives you an option to select a drive letter for the volume manually.
Note: You can only use this method for volumes that have either no file system or that use the NTFS file system.
Look for the drive that you want to extend. Then, right-click on the drive that you want to partition and select Shrink Volume.
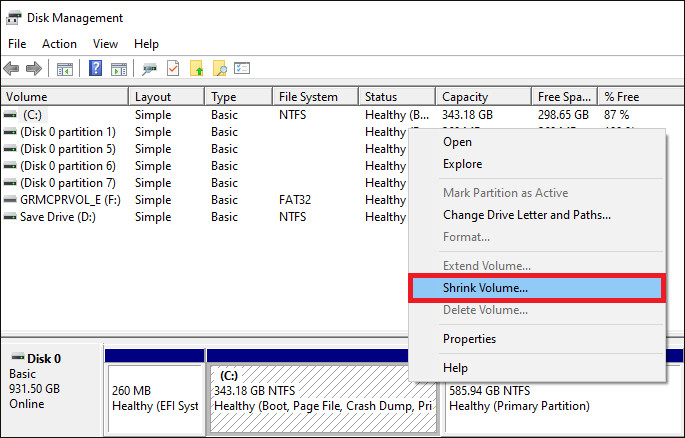
Disk Management Tool | Shrinking Volume
The shrink space will be calculated, and a window will appear. You need to set the amount of space for the new volume, then click the Shrink button to proceed.
Note: You can determine the amount of space to shrink by comparing the given Size of available shrink space in MB with the Total size after shrink in MB. You can only proceed with this method if the drive still has enough free space.
Data Units Conversion 1024 MB = 1 GB 1024 GB = 1 TB
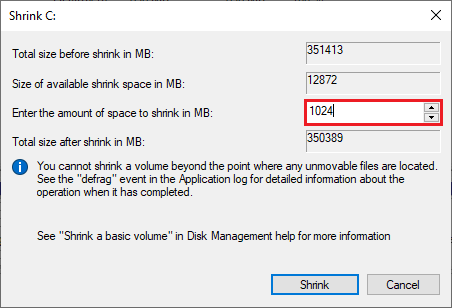
Amount of space to shrink
Once shrinking is complete, right-click on the Unallocated space that you have created and select New Simple Volume.
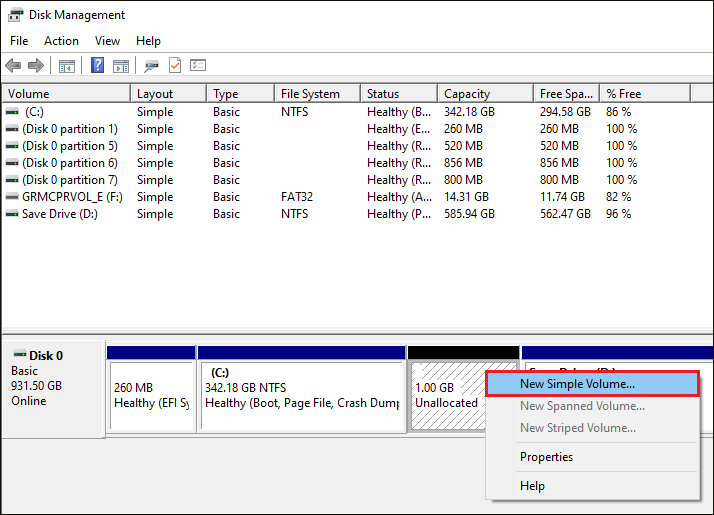
Disk Management Tool | Create New Simple Volume
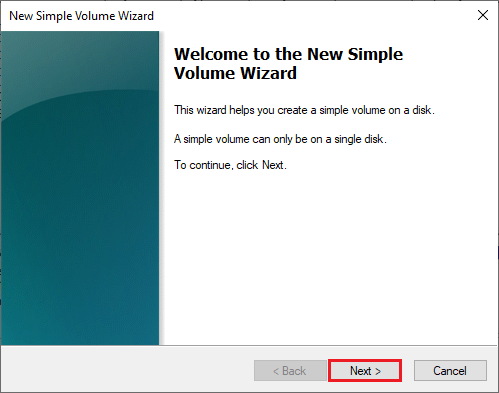
On the New Simple Volume Wizard initial page, click on Next.
New Simple Volume Wizard | Initial Page
You can specify the size of the volume you want to create, or you can also use the amount of Maximum disk space in MB then click Next.
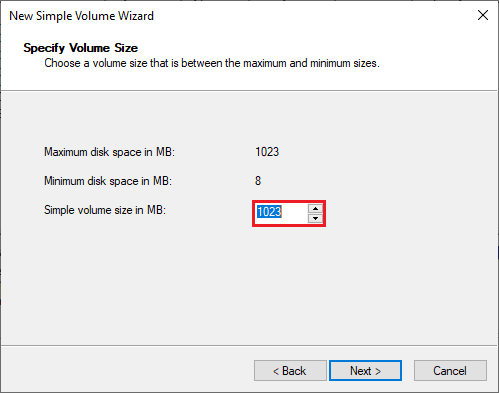
New Simple Volume Wizard | Set Volume Size
You need to assign a drive letter for the volume. To do that, click on the small drop-down box and select one from the list of available drive letters then click Next.
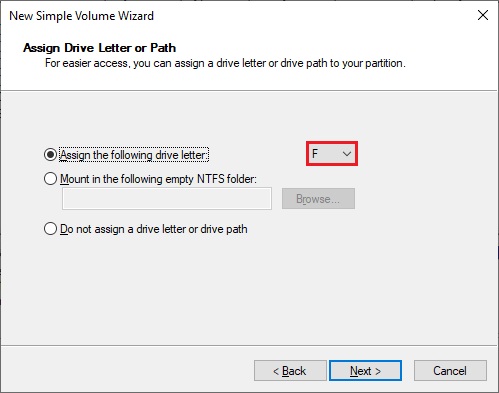
New Simple Volume Wizard | Assigning Drive Letter
Now, create a name for the volume (Volume Label) then click Next.
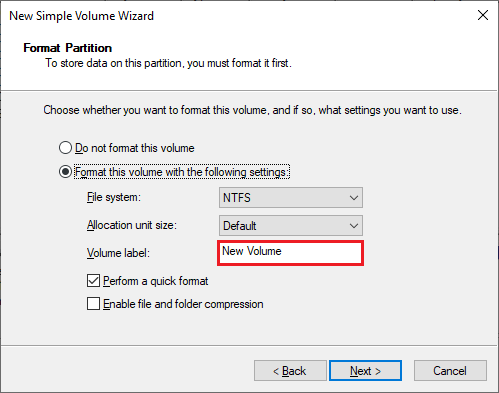
New Simple Volume Wizard | Volume Name and File System
Lastly, click Finish to complete setting up the new volume.
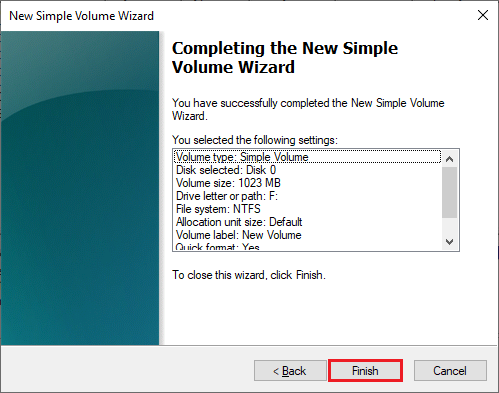
New Simple Volume Wizard | Completing Volume Partition
You can now see the volume has been successfully formatted and has the drive letter you previously selected (ex: “F:”).
Disk Management Tool | New Volume Created
Summary
In this article, you’ve learned two methods of creating drive partition using Windows 10’s built-in Disk Management Tool and the importance of drive partition.
When you have multiple partitions, the more reason you can safeguard your data files even if your operating system gets corrupted. However, this will not guarantee that your data files will remain intact should a hardware failure happen.
Reference